Pinterest

For unique Bridal and Prom Accessories click on my website below:

Pages

Search This Blog

Showing posts with label Tutorial. Show all posts

Thursday, June 5

Recycle your wedding dec's!


Vintage is still pretty big on the wedding scene at the moment, and I must admit it is one of my favourites. 

The vintage look can be achieved so cost effectively and I just wanted to share with you some ideas...


So for all you DIY brides out there here is how I recycled some old tin cans and glass jars into vintage looking candle votive s and vases at a next to nothing cost.


These look absolutely amazing going along the full length of a wedding table - we are doing a wedding that is having these on their top table later this year, so please pop back and see the pics.
Get your family and friends to collect them all for you and maybe even share a bottle or two of wine with friends one evening and encourage them to help make something towards your wedding.

You will need: 
tin cans, glass jars, spray gun, vinegar, spray paint, glue, lace, broken jewellery


Fill the spray gun or water pistol with vinegar and spray the surface of your jar/tin with a fine mist. Now spray paint on top of it straight away. The vinegar resists the paint which gives a crackled, speckled look to the glass. 


When a candle is placed inside - it looks great - trust me!


I then cut out some copies of vintage labels and stuck one on each side of the tin/jar

Added a scrap of lace and broken jewellery to pretty it up 
et voila! 


If you want these for your wedding, but don't have time/the inclination to make them yourself - we hire them from just £1 each  at:
Pop by our page and take a look at more cost effective ways and fun ideas  to decorate your wedding 

Tuesday, February 25

DIY bride - Heart garland tutorial

Thought I'd share with you DIY brides how to make this pretty heart garland. 
Great as a substitute for bunting if your sewing skills are not good, 
made from paper and very easy to make. 

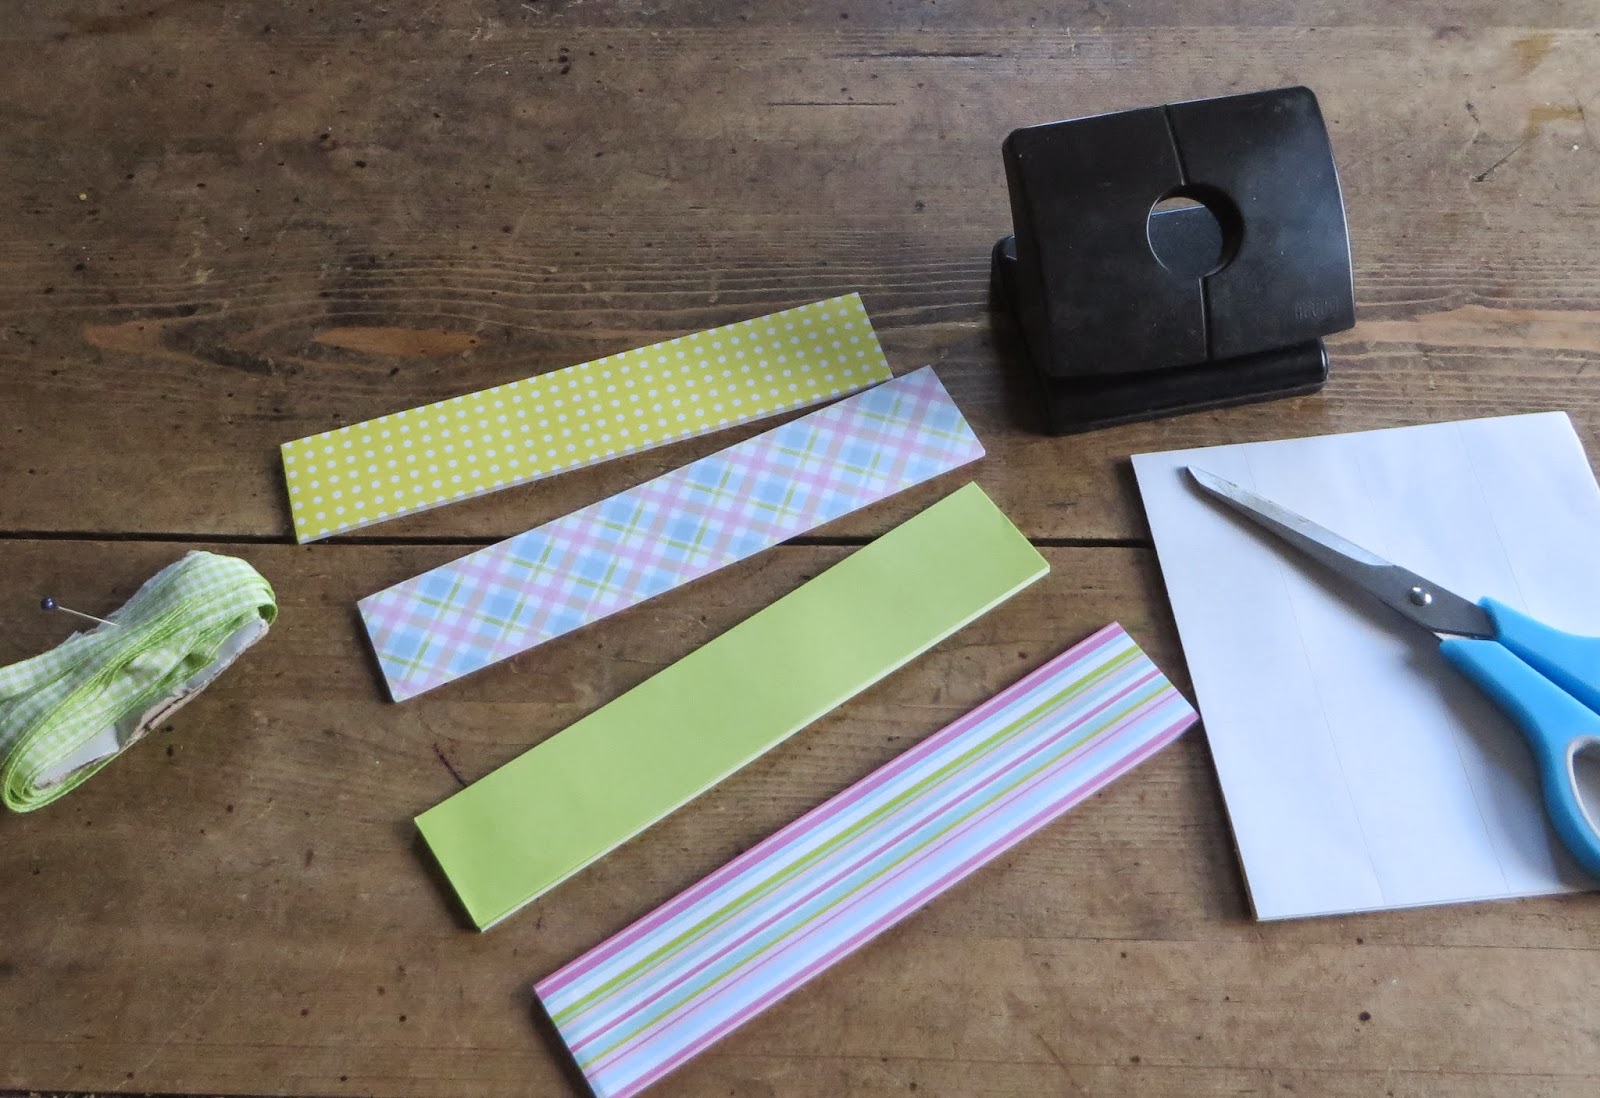
You will need:
Scissors, hole punch, ribbon, paper chain and stickers 
(or pieces of paper cut to 21cm x 4cm - one for each heart).
We used a precut paper chain pack which you can buy in hobby shops
relatively cheaply (ours cost just £1)! 

Fold the end of each strip over about a centimeter,

Attach a sticky label (or selotape) under this flap and bring the other end up to meet it and secure. 

 Your strip will now be folded in half and joined at the ends.
Place the folded paper chain under a hold punch and punch a hole about half way down the chain link. Then make another hole slightly higher. 


Open the chain link up and push the top fold down until all four holes are lined up

Thread the ribbon through all four holes and start again on a new "link". 
Thread on as many as you need and secure each end with a hanging loop knot. 
Done!

An easy way to make a fun, alternative to bunting 
that will bring lots of colour to your venue at a very reasonable price! 
Have fun making yours and come back and show us the pictures! 
Ours will be hanging in our shop window tomorrow 
when we change the theme to "Spring Bride"
For more ideas, find us on facebook:


Saturday, February 23

Videa Tutorial for Kasudamu Flowers

A few of you have asked me for a worksheet on how to make Kasudamu flowers - a Japanese paper folding technique -
but I have gone one better than that
and have, at last, got round to doing my first ever video tutorial!!
Lol - Be gentle with me...
So here goes - I hope you enjoy it ... I need to do a follow up one to show how to add the stem and buttons - so watch this space ...


Sunday, September 23

Recycled Cozy Collar Tutorial

I brought all my Autumn/Winter clothes out of the loft this week and, because I have put lots of weight on, since gving up smoking, I now have a number of cotton fleece/ sweatshirt tops that no longer fit me. The good condition ones will go to the dress agency, to earn a few pennies to buy some bigger ones - but the others are going to be made into "Cozy Collars".
These are perfect to just slip over your head before heading out into the cold - really snuggly and warm.
 
I've put a tutorial together so you can make your own - however if you are not confident in sewing, I would be happy to make you one on commission in your favourite colours.
 
Cozy Collar Tutorial
 
First lay one of your sweat shirts out flat. cut a bib shape from shoulders to whatever size and shape you want your cozy collar to be.
 
 Trim the surplus fabric from the back as shown in the picture.

Now comes the labourious part! Cut approximately 100 circles from however many sweatshirts you wish to use. I used two brown sweatshirts - but you could use a selection of any amount/colour.
 
I used a tumbler to draw around, but you could use any size circular object. All of my circles are the same size but you can mix sizes as well as colours to give a more textured look.
 
Lay one circle on top of another and fold in half
 
Then fold in half again
(sorry not sure how those old ladies hands got in the picture!)

Then stitch each folded piece onto the collar at random intervals. Once you have stitched a few on they will "fall into" each other and give a great ruffled effect.
Continue adding the circles until the whole of the bib is covered

When finished you should have something like this...
Hoping for a chilly day tomorrow so I can wear mine!
I'm really pleased with how it came out.
Recycled, unique and cozy warm :-)


Wednesday, August 22

Tea drinking...an essential part of this tutorial...

Sorting through all the craft cupboards and drawers (again!),
I found a box full of pretty lace.
All vintage, some antique, nearly all of them cotton.
Seems a shame for them to be boxed away and so I wanted to make something that used up even the tiniest of pieces.

Decided on bunting - this would look particularly good at a vintage wedding... Buy it from my shop at www.anniefloribunda.com or make your own -
Here's how I did it...

First, I sorted through the bits and pieces to see what I had and "played" around with them. I then decided to cut some cotton triangles and arrange the lace on each pennant (triangle). I decided to leave the edges rough so that they would fray naturally over time and give a nice vintage feel to them.


I used Gloria to stitch the lace randomly onto a cream cotton triangle.


I ended up with a selection of lace decorated pennants but
some of the lace was a lot whiter than the rest.

I decided it was time for a tea break (an essential part of this bunting making process, as you will see later on).

I enjoyed a cuppa and large slice of lemon cake
- (please note: the lemon cake is not an essential part of the process,
but was very nice!).
I decided to use some pretty floral bias binding I'd bought along the top to hold the pennants in place - but you could use any fabric cut on the bias, ric rac or ribbon.
Using the tea bag I'd made my cuppa with earlier,
(see, I told you it was essential :-)
I added it and about a pint of boiling water to a bowl and left it to steep.
I then added each pennant with a spoon and stirred
to ensure that they were all coated evenly.
After about 15 minutes the desired tea stain effect was achieved.

Each pennant was rinsed in cold water and hung on the line to dry. As you can see from the photo, there are no white bits now and the tea also gives the bunting a nice vintage look.

 
I folded and pressed the bias binding I had as in the picture above

 
If you're feeling lazy and you dont want to get the ironing board out, use your hair straighteners instead - works just as well!!
 
Then i stitched buttons, flowers etc onto each pennant and lay the top of the pennant in the middle of the binding and pinned in place. I stitched straight along the binding, making sure that all pennants were caught at the top.
 
This is what you should have as a finished result.


 This tutorial was interupted by the arrival of Mr & Mrs Sweeny, an intake of my delicious chilli with alcohol, folowed by a chat about IPhones, secret words and world politics :-)


Thursday, August 16

Mug, Rug and a Hug..


Whilst searching through my fabrics today, I came across these lovely patchwork squares.

The trouble is, when you buy these pre cut squares they always seem to be missing the bits of the design that you want. In this fabric it had beautifully ornate cups and saucers and another piece had an elephant on that was missing his trunk! So I couldn't use them for applique :-(

I decided to patch them all together as they all had an "Indian" feel to them and decided to make something to do with Indian tea with them.


So Glorious Gloria, the sewing machine came out
and I stitched them together, and cut, and sewed...


and cut and sewed.... and came up with a mug rug and a mug huggie too...

 Added a nice, red, vintage button to fasten...


I think I shall look for a tin to fit them both in, add a few delicious home baked biscuits and a pack of some fine Indian tea and give it as a Christmas present this year...
plenty of my family and freinds are tea lovers <3 font="font">


Wednesday, November 16

Reinvent, Revamp, Reuse, Recycle!!!!

How Oswald the owl doorstop evolved!
I am addicted... to my supermarkets new Butternut Squash and Honey Soup... delicious! I've eaten so much of it, I've become conscious of reusing all the plastic cartons that it comes in!!! Some have been used for craft storage - they stack really well and you can see whats inside without opening them.
But my favourite reuse for the soup carton has to be
Oswald - an Owl Doorstop... 


Here's how to make your own one...
You will need 

An empty soup carton, enough material to cover it and some felt scraps.
Buttons for eyes, sand or gravel to weight your dorrstop.
PVA glue and a brush to apply it. Super glue.
Scissors, marker pen, needle and thread.
Lay your fabric on a flat surface and use a marker pen to mark the top, bottom and one of the sides of the carton.


Slowly roll ithe carton along the fabric, marking top and bottom as you go and finish with the other side. You should end up with a slightly curved shape as in the picture below.

Draw around the lid of the carton twice and cut out all three pieces.
Turn the carton upside down. Lay one of the fabric circles on top. 

Cut into the circle using small slits, this will help the top to fit nice and snugly.
 Glue into place with pva glue and fold overlapping slits down and glue to sides of carton.
 Cover the sides of carton with PVA glue and glue on the main body piece of fabric. Turn up the right way and fill with sand/gravel/weighty substance. (I use play sand from my local DIY store).
Following the instructions for use, pipe some super glue into the rim of the lid, press on to the top of the carton and allow to dry.


Cover the lid with pva glue and stick on the other fabric circle.
Use a slip stitch in contrasting colour embroidery thread to fasten the bottom to the sides, to conceal the soup carton.

Turn upside down - CONGRATULATIONS! You have just created a nice solid body for your owl... now for the fun part, where your owls charachter starts to be revealed!
Play around with buttons, felt scraps etc to create an owl face that you are happy with.

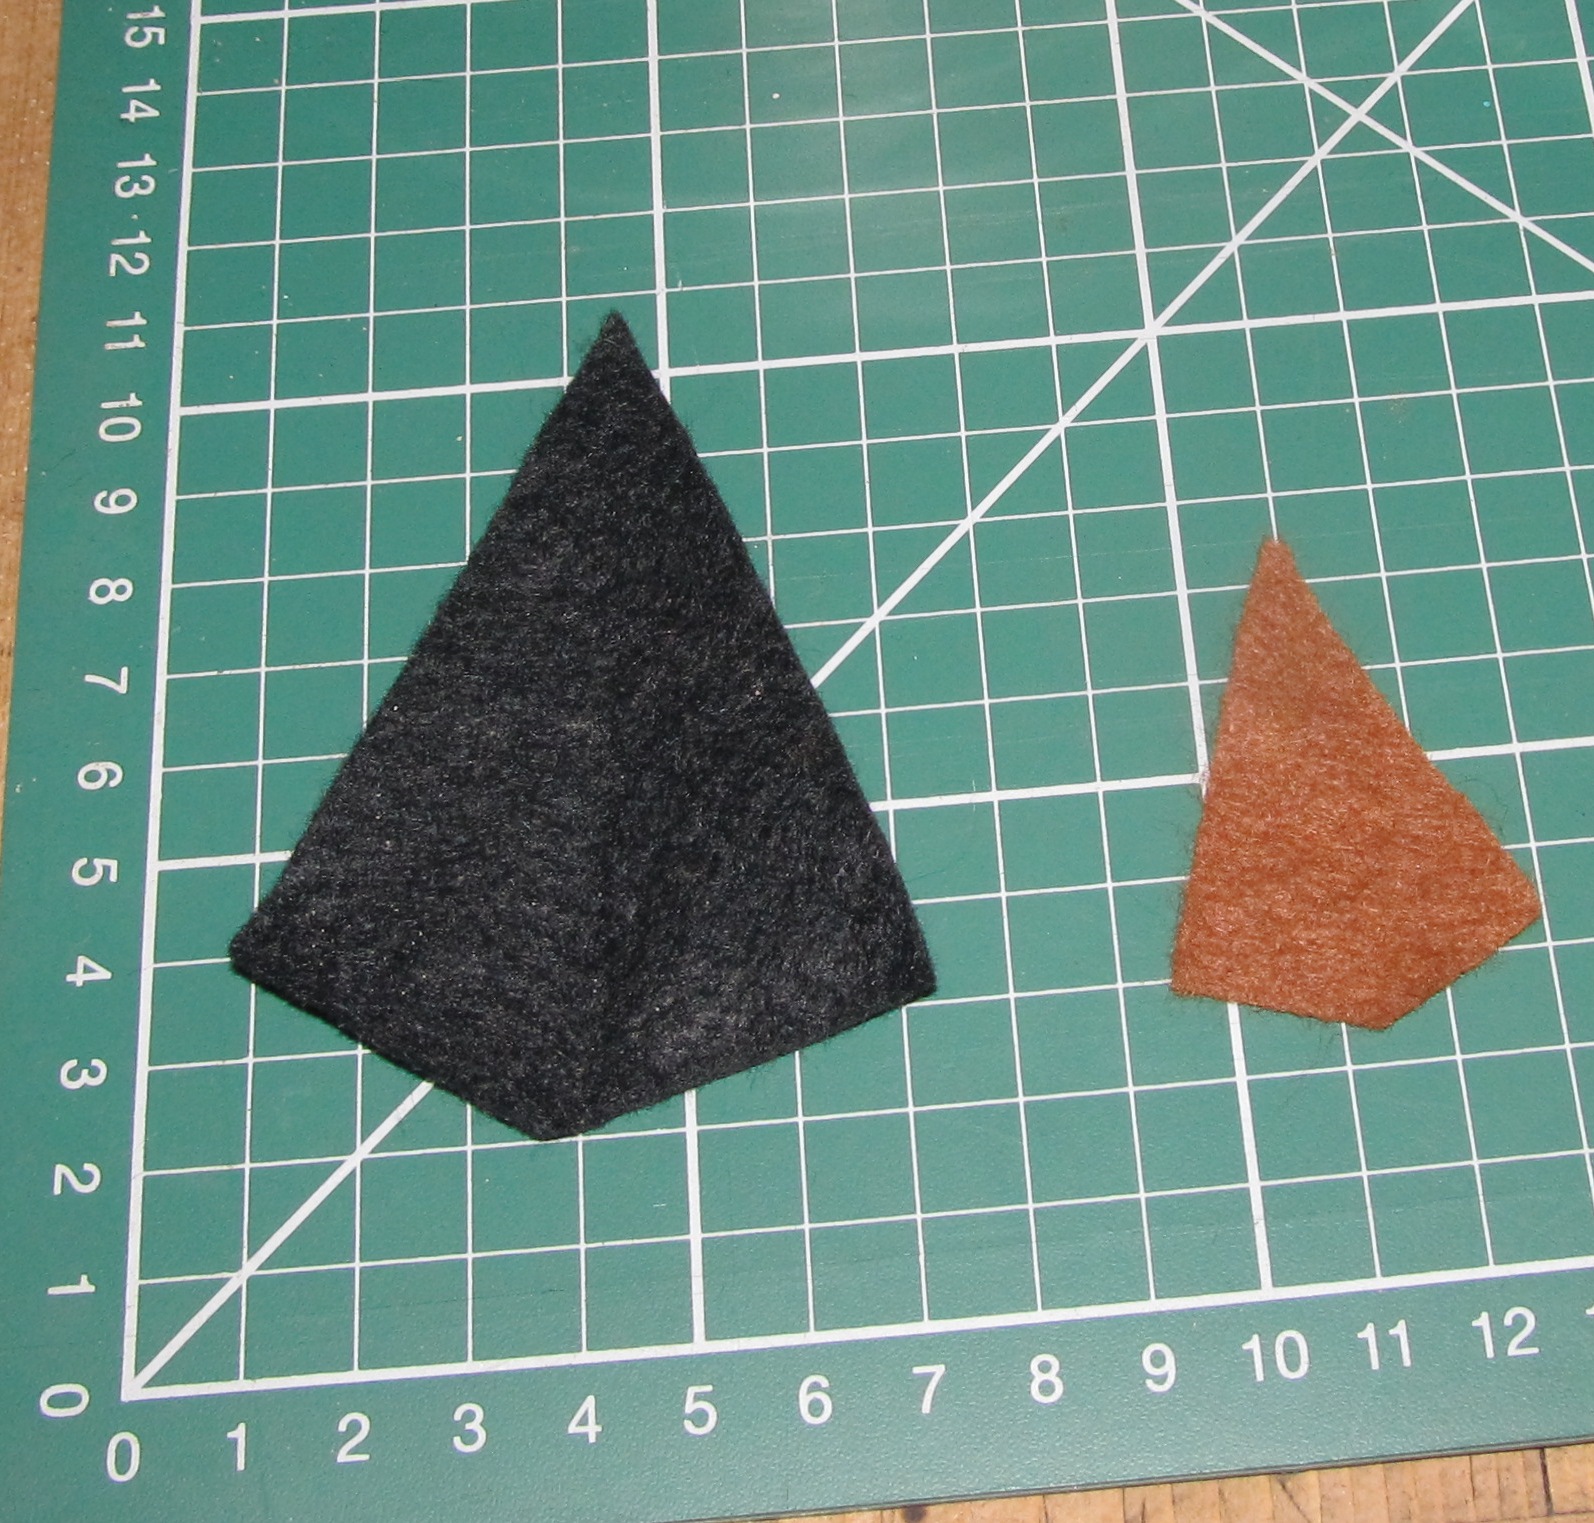
I used buttons for eyes and felt for eyebrows, ears and beak. If you want to use the same shapes as I did then copy the template below.

I cut two large shapes and one small shape from black and tan coloured felt. I then folded the large pieces in half to form the eyebrows/ears.


Then stitch and/or glue the buttons and felt in place and...
you should end up with your own charachter!
(Hope he/she isn't quite as serious as Oswald!!!)
Unfortunately, Oswald is a little too serious for us and he is looking for a more studious home where he can share in intelligent conversation and debate... if you can't live without him, you can buy him from my Folksy shop... just follow this link