Pinterest

For unique Bridal and Prom Accessories click on my website below:

Pages

Search This Blog

Saturday, December 8

Happy Vintage Christmas

I've been busily decorating the house today for Christmas :-)
Christmas songs blaring out and a little glass of my home made cassis
all added to the occassion and now I'm getting ready for the first
Christmas party of the season tonight.
 
Thought I would put all my "vintage" christmas dec' finds together ths year and mix in some new one's too on the kitchen plate rack - enjoy!


The china choir boy and the plastic Father Christmas are my favourites.
Can't wait for Christmas - it's the only time I use my special 1950's crockery :-)

Tuesday, November 27

Another easy Christmas Craft...


Cinnamon Christmas Tree

You will need:

Scraps of felt, buttons/embellishments, ribbon, cinnamon stick, scissors, glue.


Cut two triangle Tree shapes from the felt and put one to one side.

Play around with some embellishments for your tree. I used vintage buttons and ribbons – they also look great with broken jewellery and a sparkly ribbon.


If you are using ribbons – make them slightly wider than the tree so that they can tuck around the back of the tree and be stitched or glued down.

When you are happy with your design stitch or glue the items in place.

Add a thin ribbon folded in half to act as a hanger for your decoration.


Place the cinnamon stick on the plain tree shape and add some hot glue to it and to the edges of the tree. Place the decorated tree shape on top and press firmly down.

I normally give these a squirt of Christmas room spray to bring out the cinnamon smell – they make great festive air fresheners!


Hankerchief to bed quilt!

I'm having a sort through of all my vintage scraves and hankerchiefs today.
I have been collecting the hankies all year and wanted to make something out of them.
 
All so pretty and all so different,  from the Victorian era right through to the 1960's.
I've decided that I am going to stitch them together, crazy patchwork style and make either a duvet cover for the spring or a tablecloth for all those al fresco meals next summer.
I've seen this done with the blue and white stripy mens hankerchiefs and it looks fab!
It will depend how impatient I get - if patience runs out, it will be the tablecloth.
Until then, I shall carry on thrifting for them,
lovingly wash them, press them and squirell them away...
until I have enough of them to create something wonderful.

Monday, November 26

The art of thrifting...

Thought I might start to write a book...
 on the art and joys of thrifting!
 
After a serious morning's thrifting...this is what I've found today...
 
 
  • A boxful of vintage glass Christmas decorations. I went into one shop and saw a similar box but they wanted £19.99 for them! This box cost me just £1.49
  • Mother of pearl and assorted buttons :-) (You know how I LOVE my buttons!!)
  • and a pure silk spotty and striped silk scarf 
 
So many people say to me "I never see anything like that when I go in there". So perhaps there is the need for a book devoted to the secrets of good and fruitful foraging/thrifting and squirrelling!
Watch this space!
 

Sunday, November 25

Shabby Chic pressie to myself...

I wanted a nice shabby chic looking, floral chair for my sewing room and rather than spend a fortune on one, I decided to make one as a gift for myself, for all my hard work over the last year!!


I took one of our old Bentwood chairs that had some water damage on it and was in desperate need of a revamp... I covered it in napkin decoupage.

 Then I coated it in several layers of matt varnish...
 
I got the napkins from Tescos, although I think they look quite Kidstonesque!
Anyway, this is my homemade Christmas pressie from me, to me.
A chair for my sewing room :-)
What do you think of it?

Wednesday, November 21

Blogs are like buses...

I don't know about you - but for me blogs are like buses,
You don't get one for ages and then
three come along all at once...
 
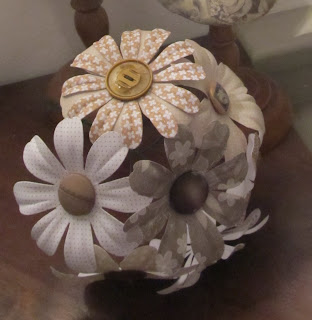
Thought I'd share with you my latest paper and vintage button flower bouquets that I made today... -


Red and Gold hearts

 Making some more Christmas decorations. These are made from Fimo clay which air dries, so no need to bother with heating it/cooking it etc.
I rolled out the fimo clay onto a piece of greaseproof paper and then cut out the heart shapes with a cookie cutter.
I made a hole in the top of each one to thread my hanging ribbon/wire through and left them to dry. On two of them I made a small indenation (not going all the way through) so that I can add a pretty button (and shank) later.

 
When they had dried I painted them with some left over sample paint I had in a deep red colour.
I painted both sides and when dry, lay some odd scraps of lace ontop of them
 
I then sprayed the surface with gold paint and lifted off the lace. Some lace works better than others. I experiemented until i found a particular pattern that i liked and then used this "Fan" piece of lace to do most of them.
 
 
then I added some buttons and thin ribbon to hang.
 
I'm going to add these to some of my parcels this year, but they look equally as good as a tree/home decoration.
Thinking they would look great for a wedding gold or silver on white/ivory background??
Go share the love!
For a Nordic looking theme with this idea,
leave the hearts white and spray the lace red :-)
 

Easy Recyclng Christmas Craft ...

 
This cute little Christmas Wreath is soooooooo easy to make - just had to share it with you!
Use an old curtain ring and glue around its edge.
Then tightly wrap some ribbon or fabric around it.
Cut out some holly shapes from some felt scraps and add these with
a red button or two for the berries.
Make a matching set or all different!
Try decoupaging the ring, or gluing buttons all around!
So many ways to use this simple idea!
Watch this space for more recyling christmas crafts!

Thursday, November 15

So much sparkle!

Waiting for some inspiration...
I'm drowning under "pretties".
I have way too many buttons, beads, lace and silks
Need to use up some of what I have before I buy anymore!
 
Made this Christmas/Wedding decoration from some of my gold buttons...
 
This one's sold :-)
 
so am looking forward to making something out of this lot...

 
I feel a real vintage sparkler of a bridal bouquet coming on...
Watch this space!


FREE Training for Small Businesses!!!

Hi Everyone!
Those of you who know me, know that I wear several caps in my working life... So with my trainer/tutor cap on...
 
Several of you have taken advantage of the free courses I've been organising. If you missed the first round of funding to train small businesses, you can now reapply for this lot.
Must be a small business (sole trader up to 250 employees)
in the North Kesteven Area, over 19 years of age.
Fully funded training available in the following: 

 HABC Level II Award in Safe Moving and Handling (QCF)
HABC Level II Award in Health and Safety in the Workplace (QCF)
HABC Level II Award in Food Safety in Catering (QCF)
EDI Level II Award in Conflict management and personal Safety in the workplace.
 

All of them are FREE (funded by European Social Fund and Lincolnshire County Council). All are one day courses. Once you have completed any of the above courses you will also be entitled to a FREE First Aid Course and certificate. 
 
Please email me on anniefloribunda@yahoo.com (or comment on here)your name, name of business and course you are interested in - I will then send you more information and check you are eligible for funding.
Any questions - just ask.
Many thanks Annie


Monday, November 12

Beautiful Buttons...

Just wanted to share these beaut's with you which I gleaned from a tin of old buttons - I especially love the navy glass snowdrop ones - FAB!
 
 
Also in this "find" were some unusual carved wooden head ones. I would think these are probably from the 1930's when people were obsessed with the Eygptian tombs and other ancient worlds...
 
 
Love my buttons!!


Saturday, September 29

Preparing the Christmas Cassis...

It's around this time of year that I start to prepare for Christmas.
As the days get colder and I spend more time inside,
I search the internet and my craft room for inspiration to make Christmas gifts and decorations for my family and freinds.
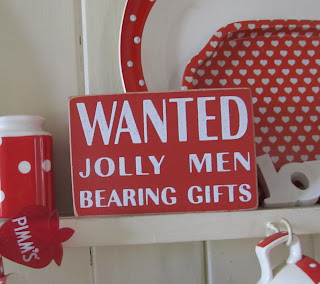
However, I couldn't resist buying this decoration the other day...
It goes perfectly on the dresser with my red and white china collection.
 
Today, I decided to make some "Christmas Cassis" - a blackcurrant liqueur.
A french lady taught me how to make this years ago and it has its origins in nineteenth century France.  It has many uses and can be drunk as a liquer, add sparkling water for a refreshing drink, plus it's syrupy texture makes it perfect for pouring over ice cream, tarts or meringues and a tablespoon added to a hearty beef stew will give your meal a real lift.
It is normally made with either brandy or gin, but you can also use vodka.  
To make it more "Christmassy" you can add some festive spice by adding a cinnamon stick and whole clove. (only one of each though, or it can be a little overpowering).
 
You will need:
 
450gms of blackcurrents
450gms caster sugar
600ml Brandy, Gin or Vodka
 
I use frozen black currants. (You can use fresh too, just discard all the stalks and leaves and give them a good wash).
Then into a sterilised jar, place the blackcurrants, sugar and brandy/gin/vodka.
Give it a good stir, crushing the blackcurrants as you go, then srew on the lid nice and tight.
 
Your drink will now turn a nice red colour which will darken over the next few weeks. You will need to let the fruit ferment for about a month, stirring and turning the jar two or three times a week.
After a month, you pass the mixture through a sieve into sterilised bottles and seal tightly.
At the end of October, I will be blogging about this and decorating the bottles to make a really personal gift... but first to find the bottles -keeping my eyes open for some nicely shaped ones!


Tuesday, September 25

Sid the hairy Scrap Slug, (tutorial)

You know how I hate to throw anything away?
Well, I was wondering what to do with the left over fabric from the sweatshirts I cut up the other day to make my cozy collar with...
there were loads of scraps from cutting out all of those circles!
I was left with the pile of scraps and some arms - I came up with this idea - 
he will probably get put away for someone for Christmas.
Meet Sid the hairy Scrap Slug...

Sid
The cat brought a slug in the other day and left it in the kitchen for me.
He was the usual, slimy type that make me shiver, 
not nice and cuddly like Sid the scrap slug.
Sid was born in my fabric cupboard, and there is nothing he enjoys more than a bit of scrap bathing (just lying about in the scraps).
He also enjoys a good game of monopoly and windsurfing at weekends.
If you made my cozy collar, and you too, now have loads of scraps - here's how you can make your own slug...

Cut slits along one of the arms

Thread the scraps through the slits and secure with a stitch or two

The more scraps you add, the hairier your slug will be
You should end up with something like this...

Turn your slug inside out and cut to the size you want him to be, tapering the edge into a tail

I stitched this seam with the sewing machine - but you can also stitch it by hand.

Then turn back to the right side, stuff well with stuffing (or more scraps),
turn his mouth under and stitch to secure.
Add two buttons for eyes and you're done!
If you are making this for a child under 3 you will need to stitch on the eyes instead of buttons to avoid a choking hazard.
Happy slug making!


Preparing the house for Autumn

Well, the leaves are (slowly) turning brown on the trees outside and with the shift we've had in weather this week, I think we can safely say that Autumn has arrived!
Mr Harry Grimwood "testing" the winter furnishings
The summer sofa covers and curtains have been changed for the cozy winter ones and cotton throws packed away and in their place wool tartan blankets strewn over the sofas.
All of those lovely spring and summer woodland walks with Mr Harry Grimwood have been worth it, as we've collected a shed full of kindling. I now need to sort them into bundles and tie with string. The kindling will then come inside along with the recycled paper bricks and logs - all ready for those lovely autumn open fires :-)
our favourite wood in the Spring
Every year I look at the pile of recycled paper logs and think "I wish I'd made more" and every year I end up making loads in September and October. I dry them in the oven when I'm cooking tea! I make them with a really cool mould that I bought on line for just £14.99 - well worth the money as it has saved me a fortune in logs and coal. You an get one from here http://www.ebay.co.uk/itm/PAPER-LOG-BRIQUETTE-MAKER-NEWSPAPER-RECYCLE-PRESS-ECO-FUEL-FIRE-BRICK-BLOCK-/330789490291 
These burn well for up to 2 hours on an open fire or in a woodburner and the great thing is knowing that they're made from rubbish post and flyers that come through the door (along with newspaper), so they are FREE !!!

 
Also time now to start making some of the (dare I saw it?) Christmas presents and decorations, so watch this blog for caramel vodka, christmas cookies and decorations to make over the next few weeks.
Top Dog Christmas Dickie Bow


Sunday, September 23

Recycled Cozy Collar Tutorial

I brought all my Autumn/Winter clothes out of the loft this week and, because I have put lots of weight on, since gving up smoking, I now have a number of cotton fleece/ sweatshirt tops that no longer fit me. The good condition ones will go to the dress agency, to earn a few pennies to buy some bigger ones - but the others are going to be made into "Cozy Collars".
These are perfect to just slip over your head before heading out into the cold - really snuggly and warm.
 
I've put a tutorial together so you can make your own - however if you are not confident in sewing, I would be happy to make you one on commission in your favourite colours.
 
Cozy Collar Tutorial
 
First lay one of your sweat shirts out flat. cut a bib shape from shoulders to whatever size and shape you want your cozy collar to be.
 
 Trim the surplus fabric from the back as shown in the picture.

Now comes the labourious part! Cut approximately 100 circles from however many sweatshirts you wish to use. I used two brown sweatshirts - but you could use a selection of any amount/colour.
 
I used a tumbler to draw around, but you could use any size circular object. All of my circles are the same size but you can mix sizes as well as colours to give a more textured look.
 
Lay one circle on top of another and fold in half
 
Then fold in half again
(sorry not sure how those old ladies hands got in the picture!)

Then stitch each folded piece onto the collar at random intervals. Once you have stitched a few on they will "fall into" each other and give a great ruffled effect.
Continue adding the circles until the whole of the bib is covered

When finished you should have something like this...
Hoping for a chilly day tomorrow so I can wear mine!
I'm really pleased with how it came out.
Recycled, unique and cozy warm :-)