Pinterest

For unique Bridal and Prom Accessories click on my website below:

Pages

Search This Blog

Tuesday, December 6

"Go"..."Create!"


Feeling quite sad that next week is my last week with Hartsholme Community Contact Centre in Lincoln...   won't see them again for a while...until the jewellery making sessions in January  :-)
Janet, Pam, Andrea and Caz have shared cups of tea and stories with me over the last couple of weeks and I will miss peering over the rim my teacup, watching their delight at creating their own unique style.
Thought I'd share with you, the fab' Christmas table decorations they made today...
They took their usual  seats, (funny how people nearly always return to the same seat week after week), and  were faced with a mountain(!) of (recycled and new), baubles, ribbons, buttons, beads, foliage, embellshments(!), indulgences(!) etc...   
"Take a plate and have a play" I told them. 
I love the way this group just "dive in" to the  materials - they seem to love them (almost) as much as I do! And time goes soooooo fast! We have a cuppa, put the world to rights and create something beautiful too!!!

Anyway, I showed them an example of one I'd made earlier,(just like Val) and said "Go! Create!" and this is what they came up with... 

Janet
 Pam
 Andrea
Caz

The following session we made these lovely boxes from wallpaper scraps and trim, buttons etc...

... I got the wallpaper from my local Interior Design Shop - they gave me an old sample book.
Looking forward to hearing how the two above were received from Pam and Janet's family and freinds.


Monday, November 28


Festive Button Wreath Tutorial

You will need:         Felt/Fabric scraps,  beads, buttons, florist wire, ribbon


Cut your scraps of felt into small pieces (about 1.5cms/  ½”) with pinking shears

Twist the end of the wire into a small hoop to stop the beads etc falling off,  and  thread the wire through felt pieces, buttons and beads, leaving about  5cms/ 2½” of bare wire.
 Put the bare wire through the hoop, twist to fasten and  hook over


Add   a pretty bow and hang!


Wednesday, November 16

Reinvent, Revamp, Reuse, Recycle!!!!

How Oswald the owl doorstop evolved!
I am addicted... to my supermarkets new Butternut Squash and Honey Soup... delicious! I've eaten so much of it, I've become conscious of reusing all the plastic cartons that it comes in!!! Some have been used for craft storage - they stack really well and you can see whats inside without opening them.
But my favourite reuse for the soup carton has to be
Oswald - an Owl Doorstop... 


Here's how to make your own one...
You will need 

An empty soup carton, enough material to cover it and some felt scraps.
Buttons for eyes, sand or gravel to weight your dorrstop.
PVA glue and a brush to apply it. Super glue.
Scissors, marker pen, needle and thread.
Lay your fabric on a flat surface and use a marker pen to mark the top, bottom and one of the sides of the carton.


Slowly roll ithe carton along the fabric, marking top and bottom as you go and finish with the other side. You should end up with a slightly curved shape as in the picture below.

Draw around the lid of the carton twice and cut out all three pieces.
Turn the carton upside down. Lay one of the fabric circles on top. 

Cut into the circle using small slits, this will help the top to fit nice and snugly.
 Glue into place with pva glue and fold overlapping slits down and glue to sides of carton.
 Cover the sides of carton with PVA glue and glue on the main body piece of fabric. Turn up the right way and fill with sand/gravel/weighty substance. (I use play sand from my local DIY store).
Following the instructions for use, pipe some super glue into the rim of the lid, press on to the top of the carton and allow to dry.


Cover the lid with pva glue and stick on the other fabric circle.
Use a slip stitch in contrasting colour embroidery thread to fasten the bottom to the sides, to conceal the soup carton.

Turn upside down - CONGRATULATIONS! You have just created a nice solid body for your owl... now for the fun part, where your owls charachter starts to be revealed!
Play around with buttons, felt scraps etc to create an owl face that you are happy with.

I used buttons for eyes and felt for eyebrows, ears and beak. If you want to use the same shapes as I did then copy the template below.

I cut two large shapes and one small shape from black and tan coloured felt. I then folded the large pieces in half to form the eyebrows/ears.


Then stitch and/or glue the buttons and felt in place and...
you should end up with your own charachter!
(Hope he/she isn't quite as serious as Oswald!!!)
Unfortunately, Oswald is a little too serious for us and he is looking for a more studious home where he can share in intelligent conversation and debate... if you can't live without him, you can buy him from my Folksy shop... just follow this link


Sunday, November 6

Vintage Treasures!!!

Visited a car boot sale yesterday and picked up some truly beautiful pieces. I bought some items from a lady whose mother and father had both worked as lace makers in Nottingham... facinating stories... and it was nice to get a little history to the pieces that I bought from her.
I think my favourite find would have to be the stunning, delicate, golden coloured lace, that looks as though it was once part of either a Victorian wedding dress or christening robe.
Now I have to think of something to make from it that will show off its beauty...still thinking!!

Tuesday, November 1

Obsessed with recycling...

I laughed at myself today, when I found myself hanging the fluff from my tumble dryer out in the garden for the Robins to recycle as nest warmers!!!!

Monday, October 31

Note Book Upcycling!


I've been busy making some notebook covers for a craft fair I am doing on December 3rd at The Methodist Church, High Street, Lincoln. It's on the same day as the Lincoln Christmas Fair - if you've never been, I highly recommend it. If you are able to, take the long walk up Steep Hill, many of the shops and houses sell mulled wine and hot chocolate laced with brandy to make the climb up the cobbled hill more bearable! Hopefully, the beautiful vintage carousel will still be there too.
Anyway... back to the notebooks...
You will need:
  • A hardback notebook
  • Fabric remnants - (I've covered some in vintage embroidered napkins, tablecloths, curtains, shirts etc. Cotton is probably the easiest to work with as it is not too bulky)
  • Pins
  • Sewing machine or willing hands!
  • Thread
  • Scissors
  • Rule
  • Buttons, card toppers, stickers, jewellery etc to embellish

Take your notebook and lay it flat onto two pieces of fabric. 
Measure a rectangle around the book, allowing for a 1cm seam allowance all the way around and then also add on 5cms for each flap that will fold in to hold the notebook in place.
Save the trimming scraps, either to make a decoration for the front of your notebook holder or for stuffing another project.
Cut the two pieces of fabric, place their right sides together and pin them together.
Using either your sewing machine or hand stitch them together, leaving a gap in the middle, on the bottom edge of about 6cms.  

Turn the fabric right side out and press with an iron. Trim off any excess fabric and use chopsticks or a pencil to push the corners right out to get a nice sharp, crisp corner. Hand stitch the gap together. 


Place the notebook in the centre of the fabric, and fold both flaps in. Make sure that you leave a little space for the book to "breathe", by closing the notebook and checking that the fabric is not too tight.

Pin each flap to secure, and carefully remove the notebook.
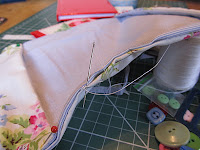
Sew the flaps at the top and bottom of the cover. Y0ou can either do this by hand as in the picture below or stitch on the machine around the rectangular shape as close to the edge as possible (the brown ones at the top of this post, are made in this way).


Now comes the fun part! Raid your button tin and hunt out some buttons of similar or contrasting colours to your fabric.

Have a play! Try out some different designs with your buttons/buckles/charms/ribbons/beads etc, until you are happy with the design and stitch or glue in place.


  1. Pop the cover over your notebook and you're done!
The possibilities with this project are endless. Experiment with different fabrics: silks, tweeds, shrunken jumpers, sacking etc... etc... Add personalised embellishments such as charms, buttons, badges, etc and create a unique personalised gift for someone.

Sunday, October 30

Christmas on a shoestring!


Since resigning from work, money has been tight... so this year family and friends will be getting more than their usual amount of hand crafted gifts from us!


This year it's Christmas on a shoestring ... and Christmas just wouldn't be the same without Aunties Homemade Choca Vodka ... deliciously wicked and a favourite with young and old...


Chocolate Vodka is soooooooooo easy to make!


You will need
  • A half bottle of vodka, (You can use cheap brand vodka for this as it is soooooooooo chocolaty, you wont notice!)
  • 5 Mars Bars (Or other chocolate of your choice - as long as it isn't biscuit based, Mint Aero and Bounty make good alternatives),
  • a dishwasher (or a saucepan of hot water).
Chop the chocolate bars into small blocks and add to the bottle of vodka, (you will need to remove some of the vodka). Screw the lid back on tightly and put through the hottest cycle on your dishwasher. The heat will melt the chocolate.

If you don't have a dishwasher, then put the chopped chocolate bars onto a plate over a pan of boiling water and melt. Then add to the vodka. Give it a good shake and store in the fridge.
Decorate with your own hand made labels and pretty ribbons for a very personal touch.


Thursday, October 20

Top Dog Dickie Bow Ties for dogs...whatever next


Mr Harry Grimwood and I have been to the woods. I thought we were going to collect kindling. He thought we were going to chase pheasants and snuffle.
So, collecting the kindling was left to me. I always feel so at home in the woods, whatever the season, I love the smells and sounds, (almost as much as Mr Grimwood!) and can walk for ages just breathing it all in.
When I young, I found a small copse, off Well Lane - I never saw anyone else there and used to believe that no one else knew about it. I used to lie down on the bluebells and look at the sky through the leaves. It's probably housing now - but I try not to think about that.


It was nippy today, there was a light Autumnal bite in the air and I was glad I'd got the wood burner going that morning, for our return. I spent the rest of the day sewing things for a Christmas Craft fair I'm doing in December

I've had a few orders for my "doggie dickies" and Harry has been kind enough to model them for me.

Seems odd not to be sitting in an office anymore - but since I've been off work, I've been keeping myself busy with my crafts. My "office" nowadays is the kitchen table and has a much more comfortable atmosphere! Plus chocolate cookies are close to hand :-)

Tuesday, August 23

I was going to conquer the world and then I saw something Sparkly!


I have always been distracted by sparkly items and I blame it all on my aunt. When I was at a young, impressionable age she would swan into our home with a blonde beehive 2 ft high, the latest boyfriend/husband!, mini skirt, long talon nails (always polished), two little Chiuauaus and ALWAYS had on sparkly diamonte jewellery. As a child I was transfixed by my glamorous aunt and the colours and shapes of her brooches and am sure that is why (even to this day) I cannot resist one if I see it at a fete, boot sale or antique/flea market!

I love to work with these "heirlooms", and hate to see a brooch discarded purely because it's pin is broken or it has lost a few stones. I have a kind of jewellery hospital in my spare room now, where I store them all away, until I find another, equally beautiful, but damaged piece and put the two together so that they can live on!

I like to "reinvent" pieces - I use necklaces and bracelets for headbands and tiaras and brooches for bridal bouquets and hair combs...