Pinterest

For unique Bridal and Prom Accessories click on my website below:

Pages

Search This Blog

Showing posts with label bunting. Show all posts

Tuesday, February 25

DIY bride - Heart garland tutorial

Thought I'd share with you DIY brides how to make this pretty heart garland. 
Great as a substitute for bunting if your sewing skills are not good, 
made from paper and very easy to make. 

You will need:
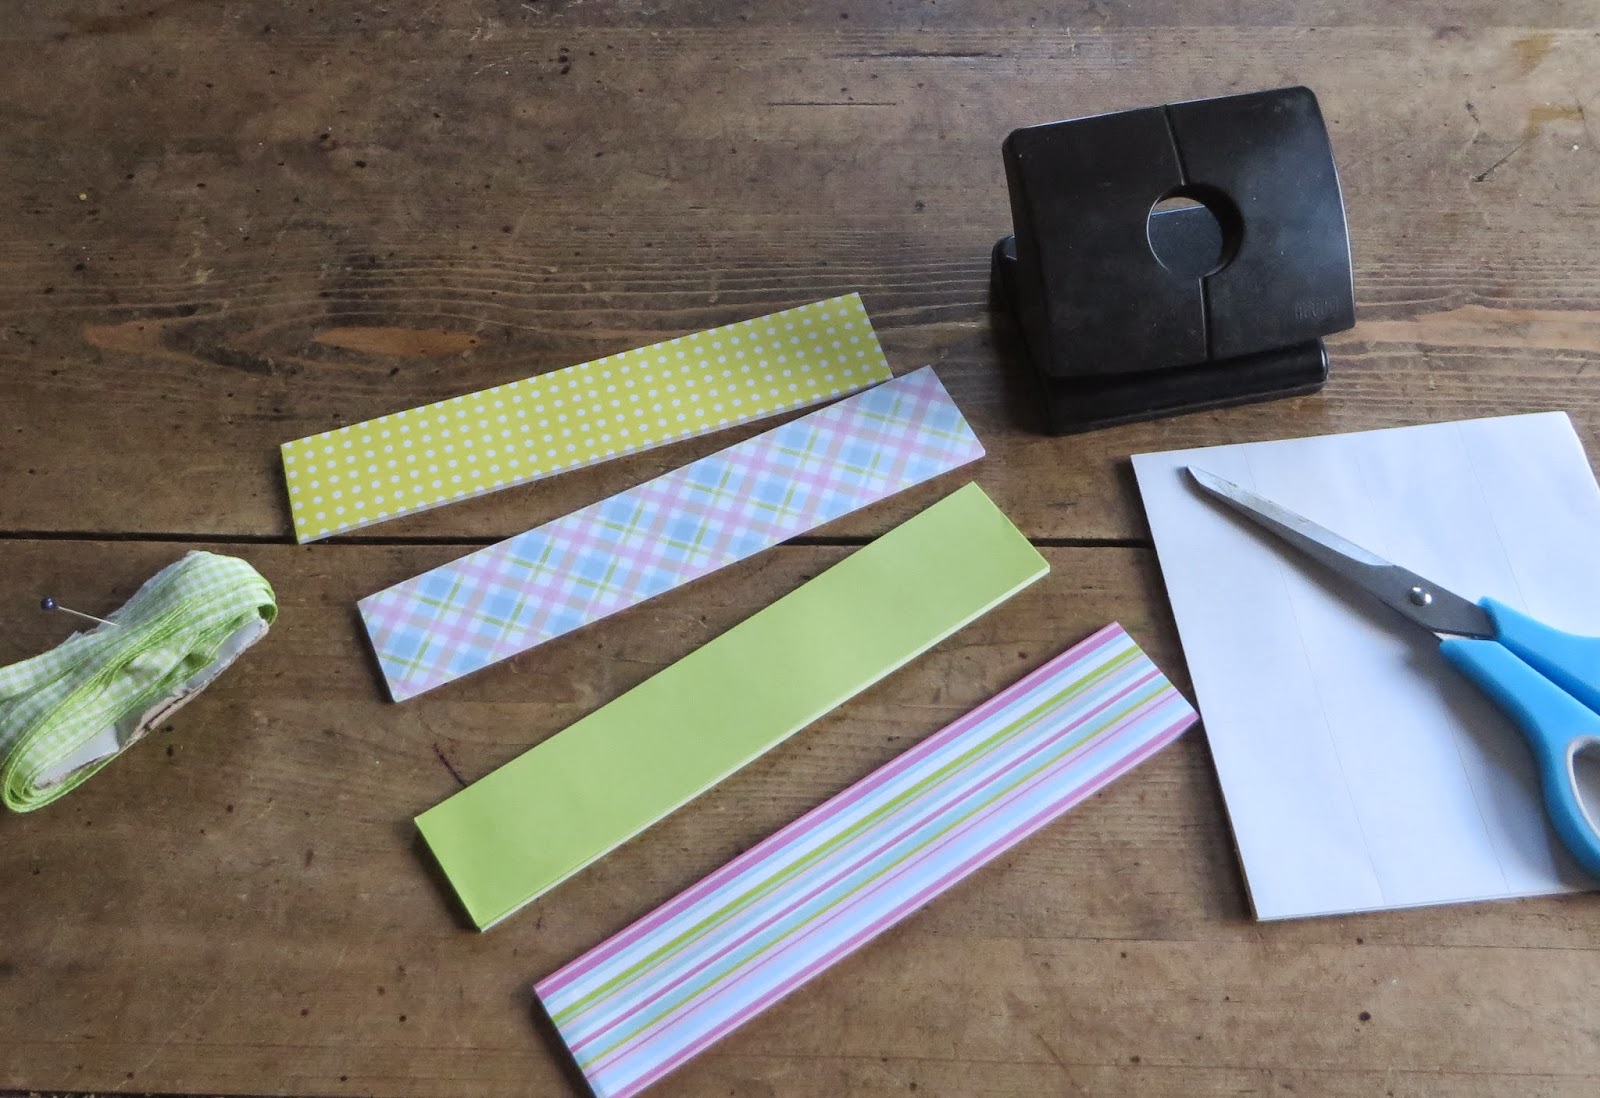
Scissors, hole punch, ribbon, paper chain and stickers 
(or pieces of paper cut to 21cm x 4cm - one for each heart).
We used a precut paper chain pack which you can buy in hobby shops
relatively cheaply (ours cost just £1)! 

Fold the end of each strip over about a centimeter,

Attach a sticky label (or selotape) under this flap and bring the other end up to meet it and secure. 

 Your strip will now be folded in half and joined at the ends.
Place the folded paper chain under a hold punch and punch a hole about half way down the chain link. Then make another hole slightly higher. 


Open the chain link up and push the top fold down until all four holes are lined up

Thread the ribbon through all four holes and start again on a new "link". 
Thread on as many as you need and secure each end with a hanging loop knot. 
Done!

An easy way to make a fun, alternative to bunting 
that will bring lots of colour to your venue at a very reasonable price! 
Have fun making yours and come back and show us the pictures! 
Ours will be hanging in our shop window tomorrow 
when we change the theme to "Spring Bride"
For more ideas, find us on facebook:


Tuesday, September 18

Pink & Green Wedding Bunting...

Just finished this commission for Pink and green wedding bunting - has now been posted off to Wales, to Dee for her Top Table.
Made from all vintage linens, lace, buttons, beads etc
I like the cream shabby chic cherubs on the central pennant, above "Mr & Mrs"


I'm happy to take commissions for this in your own colourway and if you can't live without it, you can order it by the meter (£10 per meter), from my shop at

Wednesday, September 5

Powder blue, pale gold and Ivory Wedding Bunting


Special commission - all finished now...
and winging it's way to Rachel tomorrow, for her wedding...
Powder blue and ivory cotton fabrics
embellished with vintage lace, pearls,
ribbons and flowers


Wednesday, August 22

Tea drinking...an essential part of this tutorial...

Sorting through all the craft cupboards and drawers (again!),
I found a box full of pretty lace.
All vintage, some antique, nearly all of them cotton.
Seems a shame for them to be boxed away and so I wanted to make something that used up even the tiniest of pieces.

Decided on bunting - this would look particularly good at a vintage wedding... Buy it from my shop at www.anniefloribunda.com or make your own -
Here's how I did it...

First, I sorted through the bits and pieces to see what I had and "played" around with them. I then decided to cut some cotton triangles and arrange the lace on each pennant (triangle). I decided to leave the edges rough so that they would fray naturally over time and give a nice vintage feel to them.


I used Gloria to stitch the lace randomly onto a cream cotton triangle.


I ended up with a selection of lace decorated pennants but
some of the lace was a lot whiter than the rest.

I decided it was time for a tea break (an essential part of this bunting making process, as you will see later on).

I enjoyed a cuppa and large slice of lemon cake
- (please note: the lemon cake is not an essential part of the process,
but was very nice!).
I decided to use some pretty floral bias binding I'd bought along the top to hold the pennants in place - but you could use any fabric cut on the bias, ric rac or ribbon.
Using the tea bag I'd made my cuppa with earlier,
(see, I told you it was essential :-)
I added it and about a pint of boiling water to a bowl and left it to steep.
I then added each pennant with a spoon and stirred
to ensure that they were all coated evenly.
After about 15 minutes the desired tea stain effect was achieved.

Each pennant was rinsed in cold water and hung on the line to dry. As you can see from the photo, there are no white bits now and the tea also gives the bunting a nice vintage look.

 
I folded and pressed the bias binding I had as in the picture above

 
If you're feeling lazy and you dont want to get the ironing board out, use your hair straighteners instead - works just as well!!
 
Then i stitched buttons, flowers etc onto each pennant and lay the top of the pennant in the middle of the binding and pinned in place. I stitched straight along the binding, making sure that all pennants were caught at the top.
 
This is what you should have as a finished result.


 This tutorial was interupted by the arrival of Mr & Mrs Sweeny, an intake of my delicious chilli with alcohol, folowed by a chat about IPhones, secret words and world politics :-)


Thursday, May 26

It's Vintage Daaaaaaaaarling!


Well, the "Monroe" tiara is finished. Unique, the only one in the whole wide world, Just need to find a quirky bride now to wear it! I used vintage buttons and jewellery, pretty roses and beads - the central brooch has deliberately not been wired onto the tiara, so that it can be unpinned and worn as as a keepsake/reminder of the perfect day!


Had great fun making it and think I may have to do another! If you are getting married and you can't live without it...then visit my Folksy shop by clicking on the Folksy link at the top of my blog.


Found an old Sanderson wallpaper catalogue the other day...the classic designs were so beautiful I couldn't send them to the landfill. I covered some wooden bunting with the Suva pattern - pretty humming birds, birds of paradise and flowers in shades of blue...